Email Configuration Guide
This guide uses QQ Mail as an example to explain how to configure the Email adapter and connect Nekro Agent to email sending and receiving workflows.
Tip
The current adapter version does not support mailboxes that require OAuth authentication, such as Gmail or Outlook.
Tip
Different mailbox providers use different settings. Always follow the actual mailbox provider's requirements.
Before You Start
- You have already deployed Nekro Agent
- You have an email account prepared for testing
- IMAP and SMTP are already enabled in the mailbox console
- You have obtained the mailbox authorization code or app-specific password
Step 1: Open the mail provider console and get the authorization code
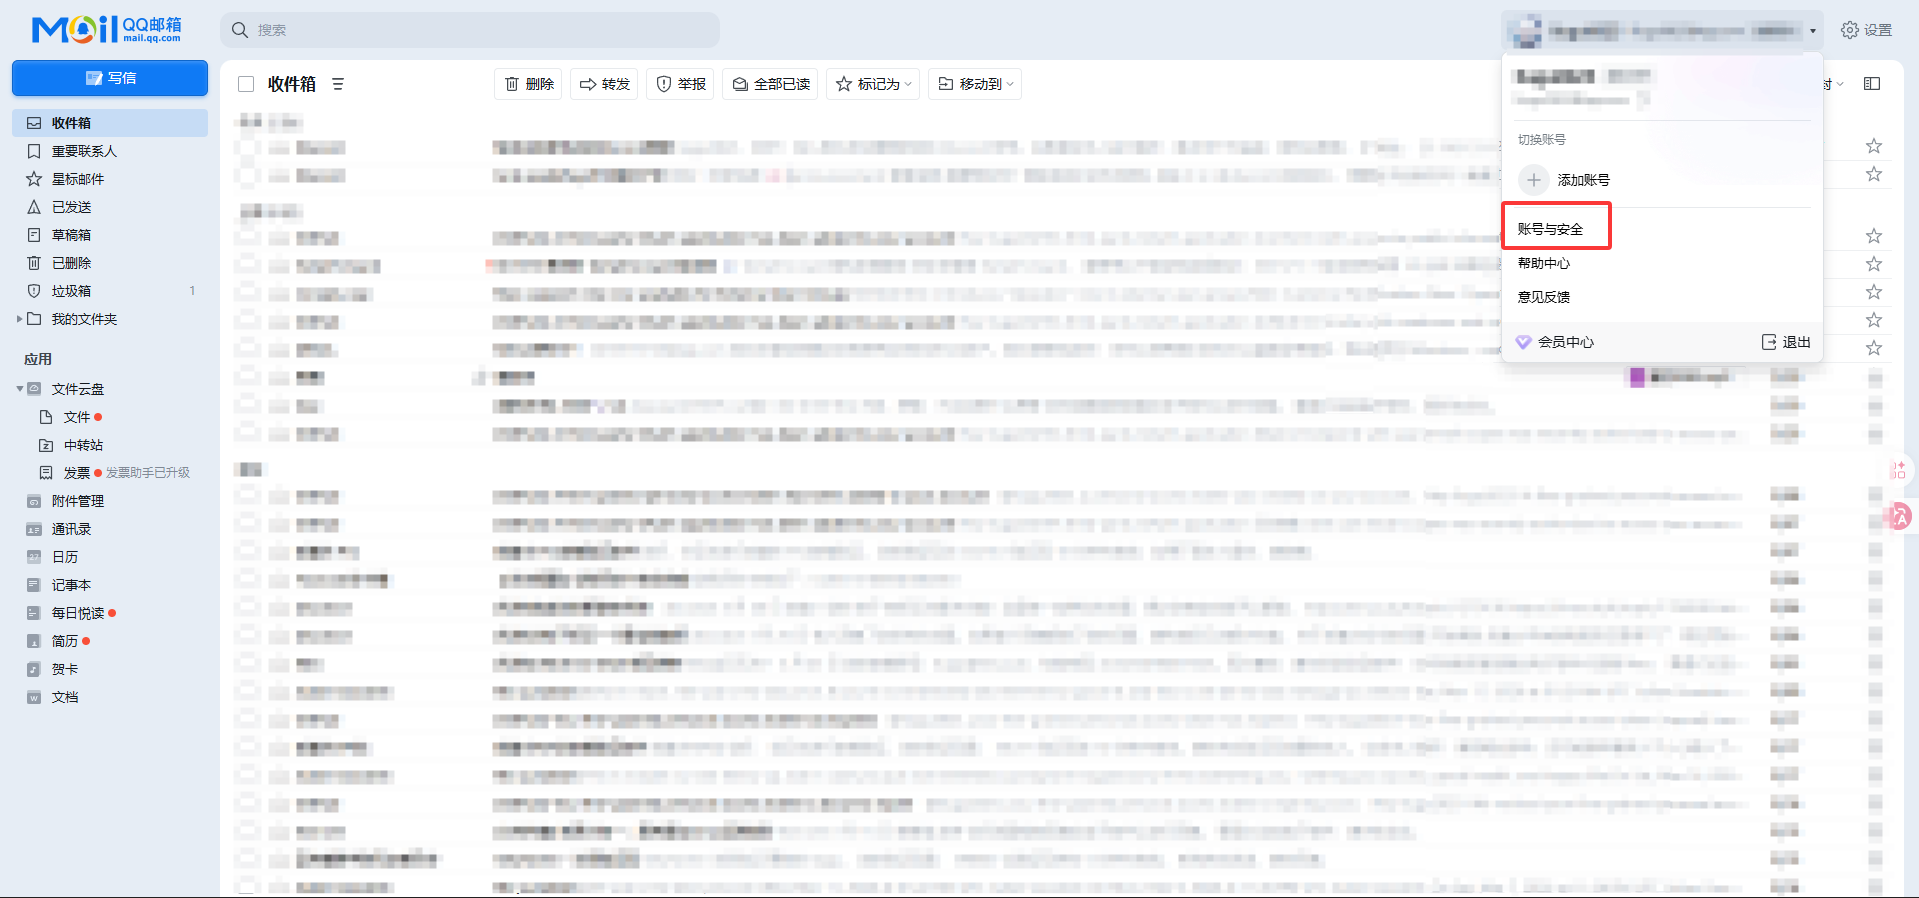
- Log in to QQ Mail
- Click
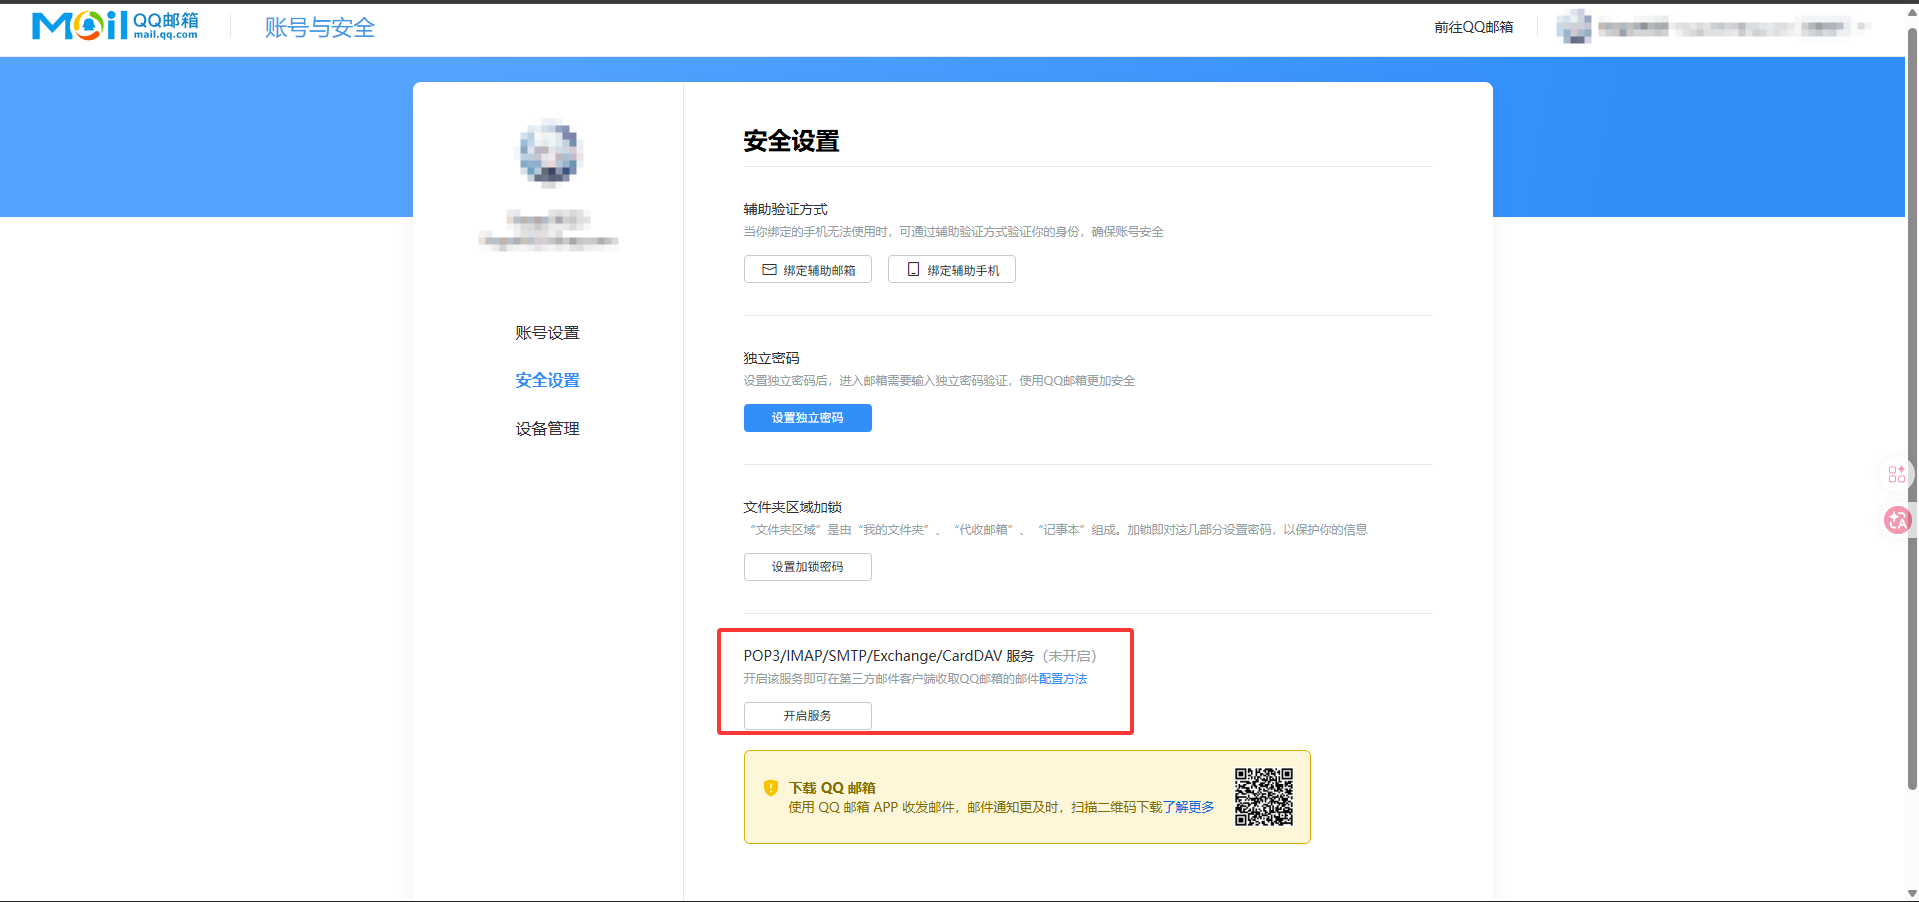
Account & Securityfrom the account menu in the upper-right corner - In the page that opens, click
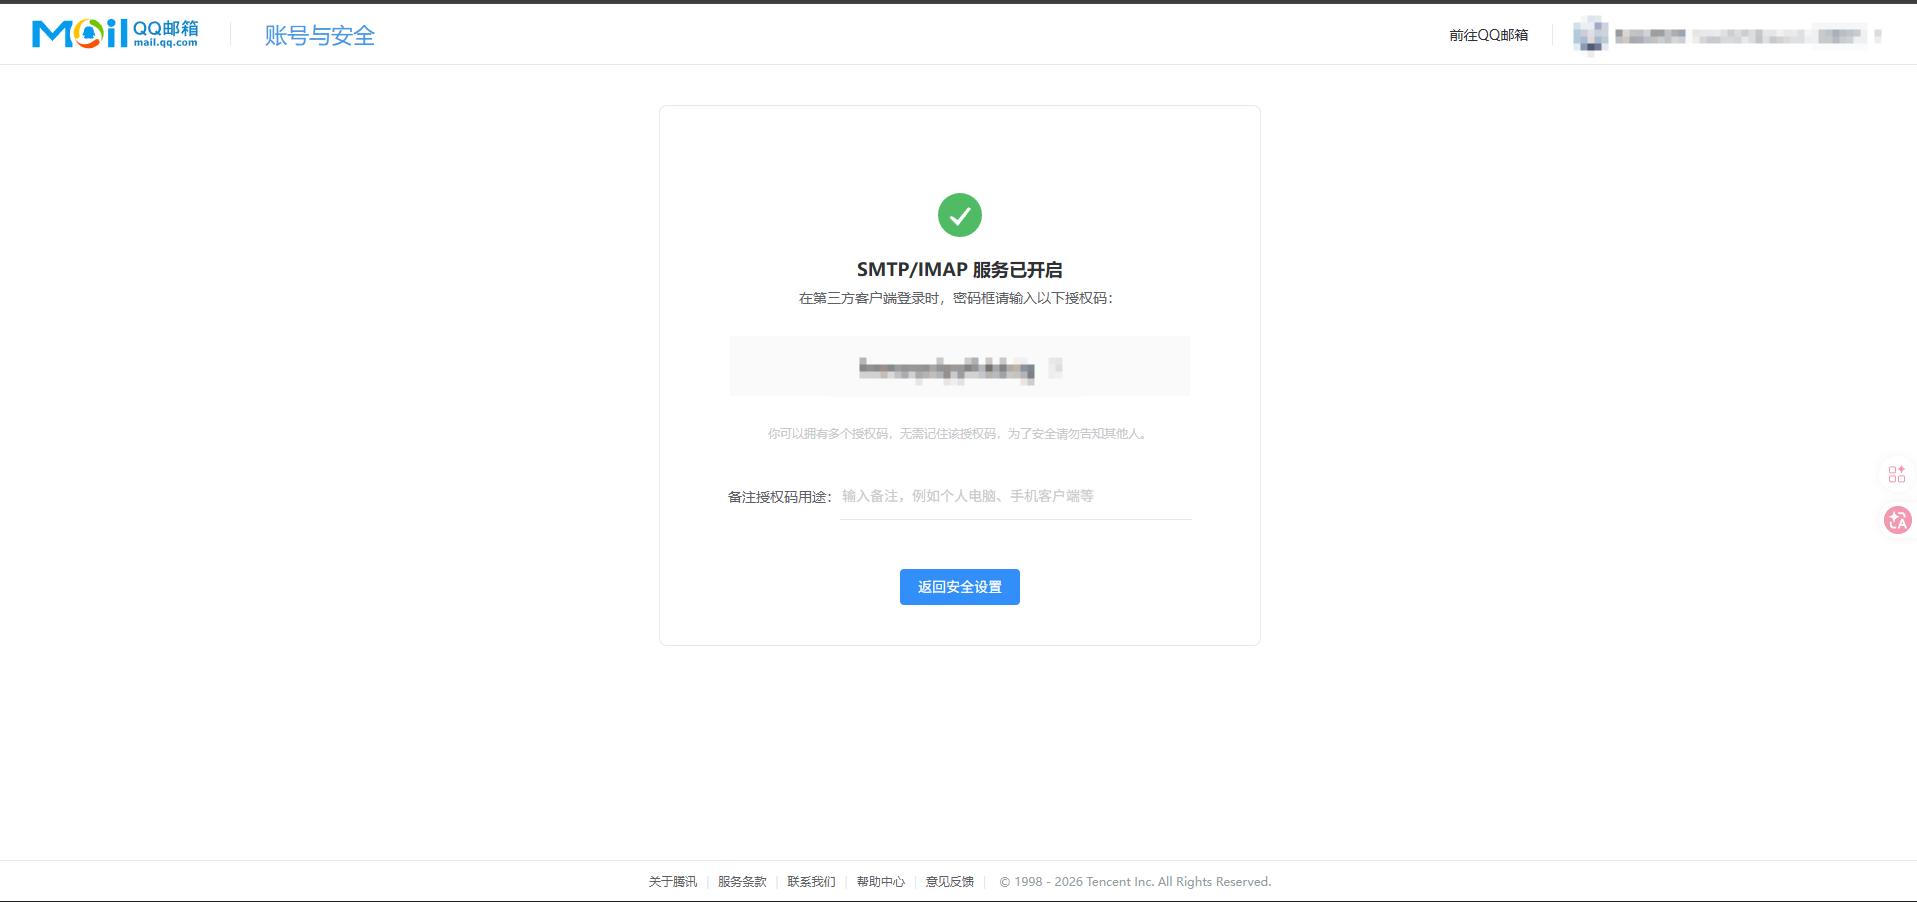
Security Settings, then enable the service underPOP3/IMAP/SMTP/Exchange/CardDAV - Follow the instructions to enable the related services
- Record the authorization code
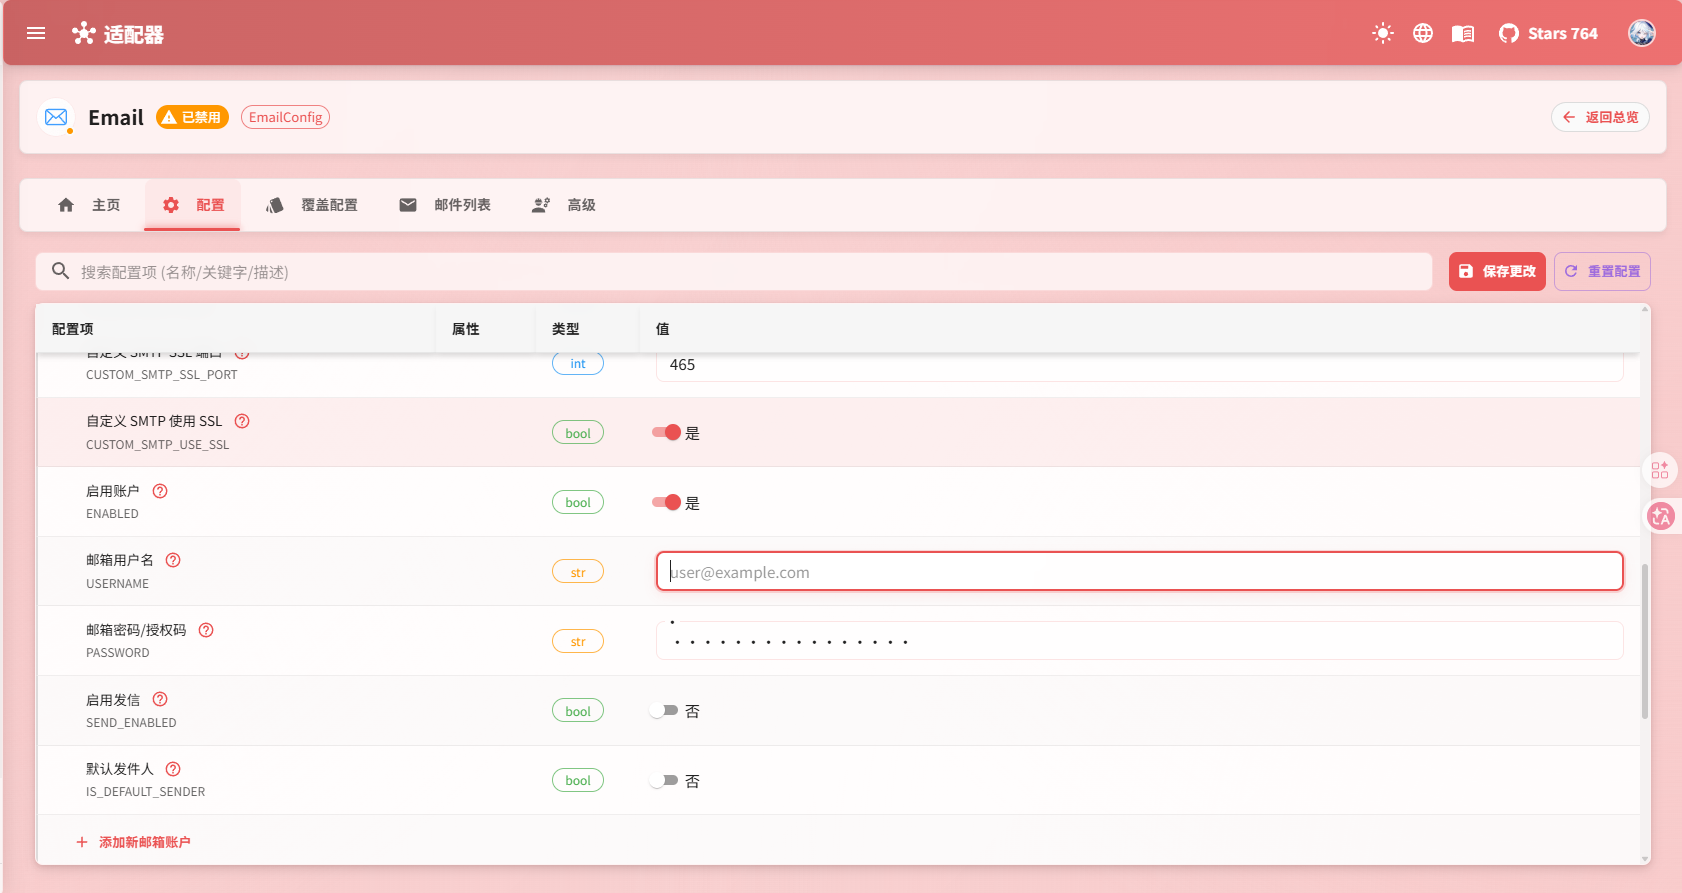
Step 2: Add the mailbox account in Nekro Agent
- Open
Adapters->Email - Turn on
Enable Adapter - Add a new account in
Email Account List - Fill in
Provider - Fill in
Email AddressandAuthorization Code - If this account should also send mail, turn on
Enable Sending - If you want to always send with this account by default, also turn on
Default Sender - Save the settings and restart Nekro Agent
How to fill in the common fields
Provider: Common values areQQ Mail,163 Mail, orCustomUsername: Full email address, for example[email protected]Password / Authorization Code: The authorization code or app-specific passwordEnable Sending: Whether this mailbox can send mailDefault Sender: Whether this mailbox is the default sender
If you choose Custom, you also need to fill in:
Custom IMAP HostCustom IMAP PortCustom SMTP HostCustom SMTP PortCustom SMTP SSL Port
Step 3: Configure polling and notifications
These are the global settings you should check first:
Polling Interval (Seconds): How often to check for new mail. Default is 30 secondsUnread Only: Whether to fetch only unread emailsMaximum Fetch Count: Maximum number of messages fetched each timeMark as Read After Fetch: Whether to mark messages as read after fetchingEnable New Mail Notification: Whether to enable new mail notificationsNotification Chat: Which chat to send the notification to
When using it for the first time, it is recommended to keep the default values and change them only when necessary.
Step 4: Confirm that the setup works
- Send a test email to this mailbox
- Wait for one polling cycle
- Check whether a new Email chat appears in Nekro Agent
- If sending is enabled, also try asking the AI to send a test email
What You Will See After the Setup
Each mailbox account appears as an individual chat:
email-<your-email-address>For example:
Where attachments are stored
Mail attachments are automatically saved to:
data/uploads/email_attachment/{mailbox-account}/{message-uid}/{attachment-file-name}If you plan to let the AI handle attachments, make sure the data directory is writable.
Common Problems
The username and password seem correct, but it still cannot connect
Most of the time, the problem is that you entered the login password instead of the authorization code.
Mail can be received, but cannot be sent
Check these first:
- Whether
Enable Sendingis enabled for the current account - Whether SMTP is enabled on the mailbox provider side
- Whether this mailbox is set as the default sender, or whether you explicitly selected the account when sending
Two mailboxes are both set as the default sender
This is not allowed. There can only be one default sender.