WeCom Custom App Configuration Guide
This guide explains how to configure the WeCom custom app adapter and connect Nekro Agent through WeCom's app callback mode.
Before You Start
- You have already deployed Nekro Agent
- You have access to the WeCom admin console
- You have prepared a public HTTP/HTTPS address that can be reached from the Internet
Step 1: Create a custom app in the WeCom admin console
- Open the WeCom custom app admin page
- Web entry:
App Management->App Management->Create App - Desktop: not supported
- Web entry:
- Fill in the app name and description, choose the visibility scope, and upload an image as the app icon
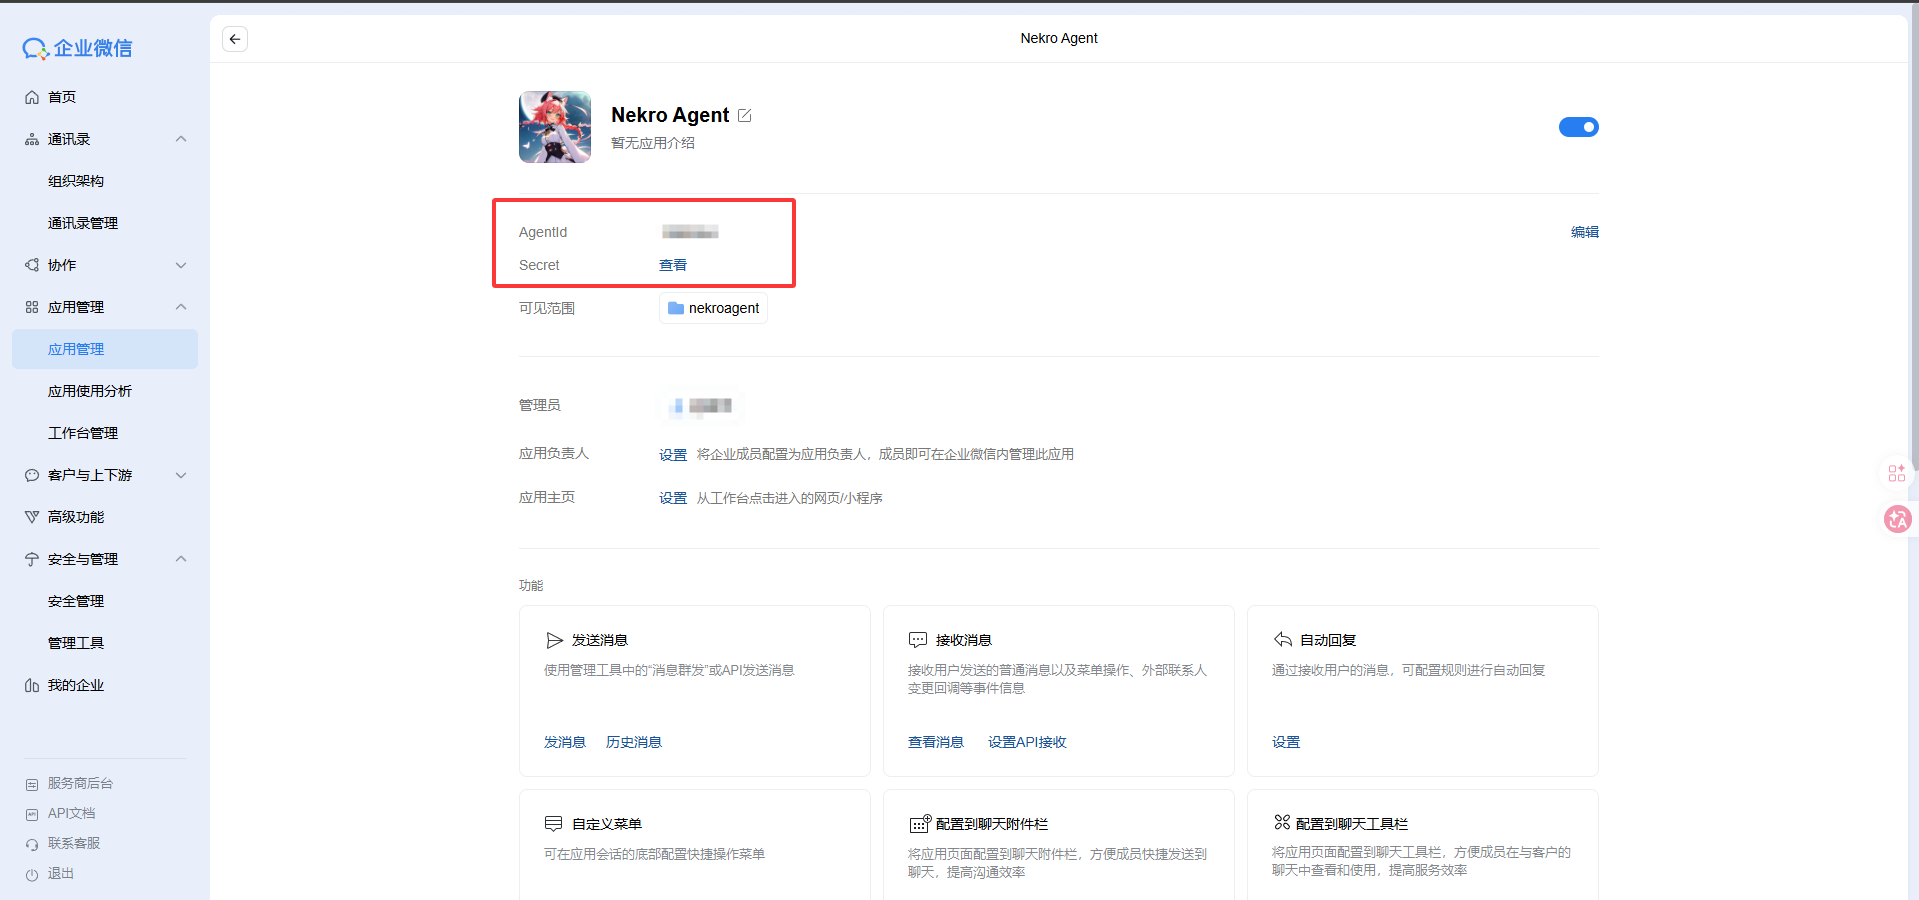
- On the app home page, record
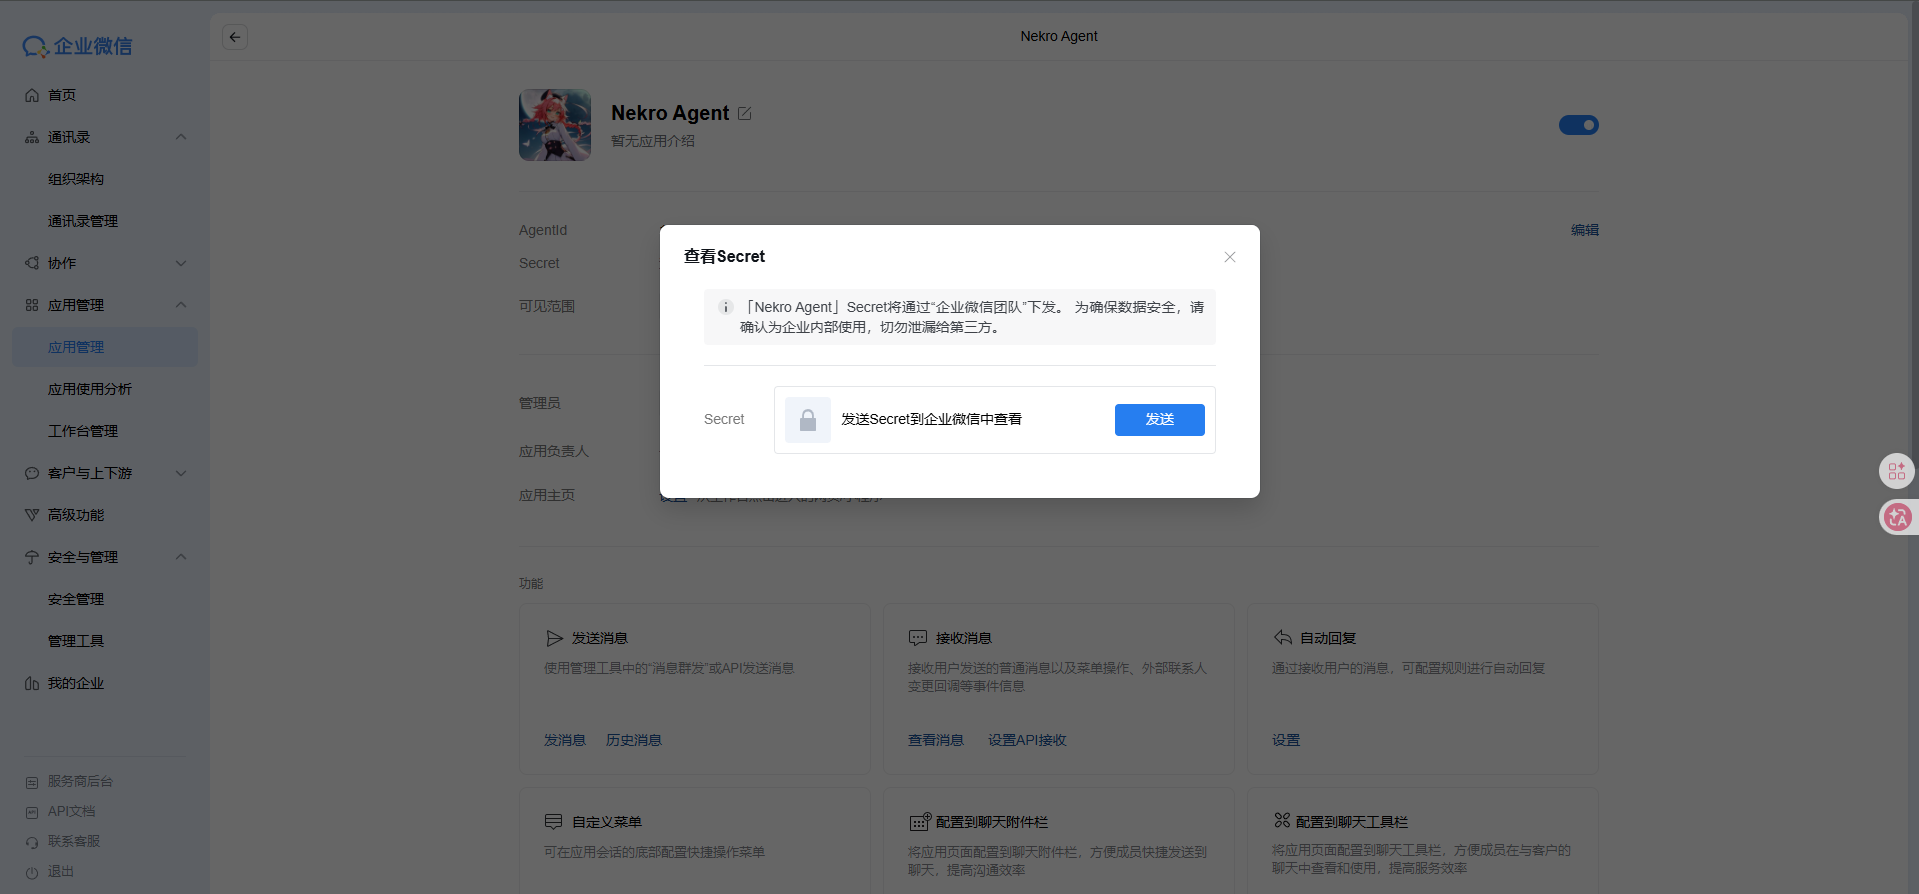
AgentIdandSecret. To viewSecret, click to reveal it and verify it in the corresponding enterprise account on desktop or mobile if required - Under
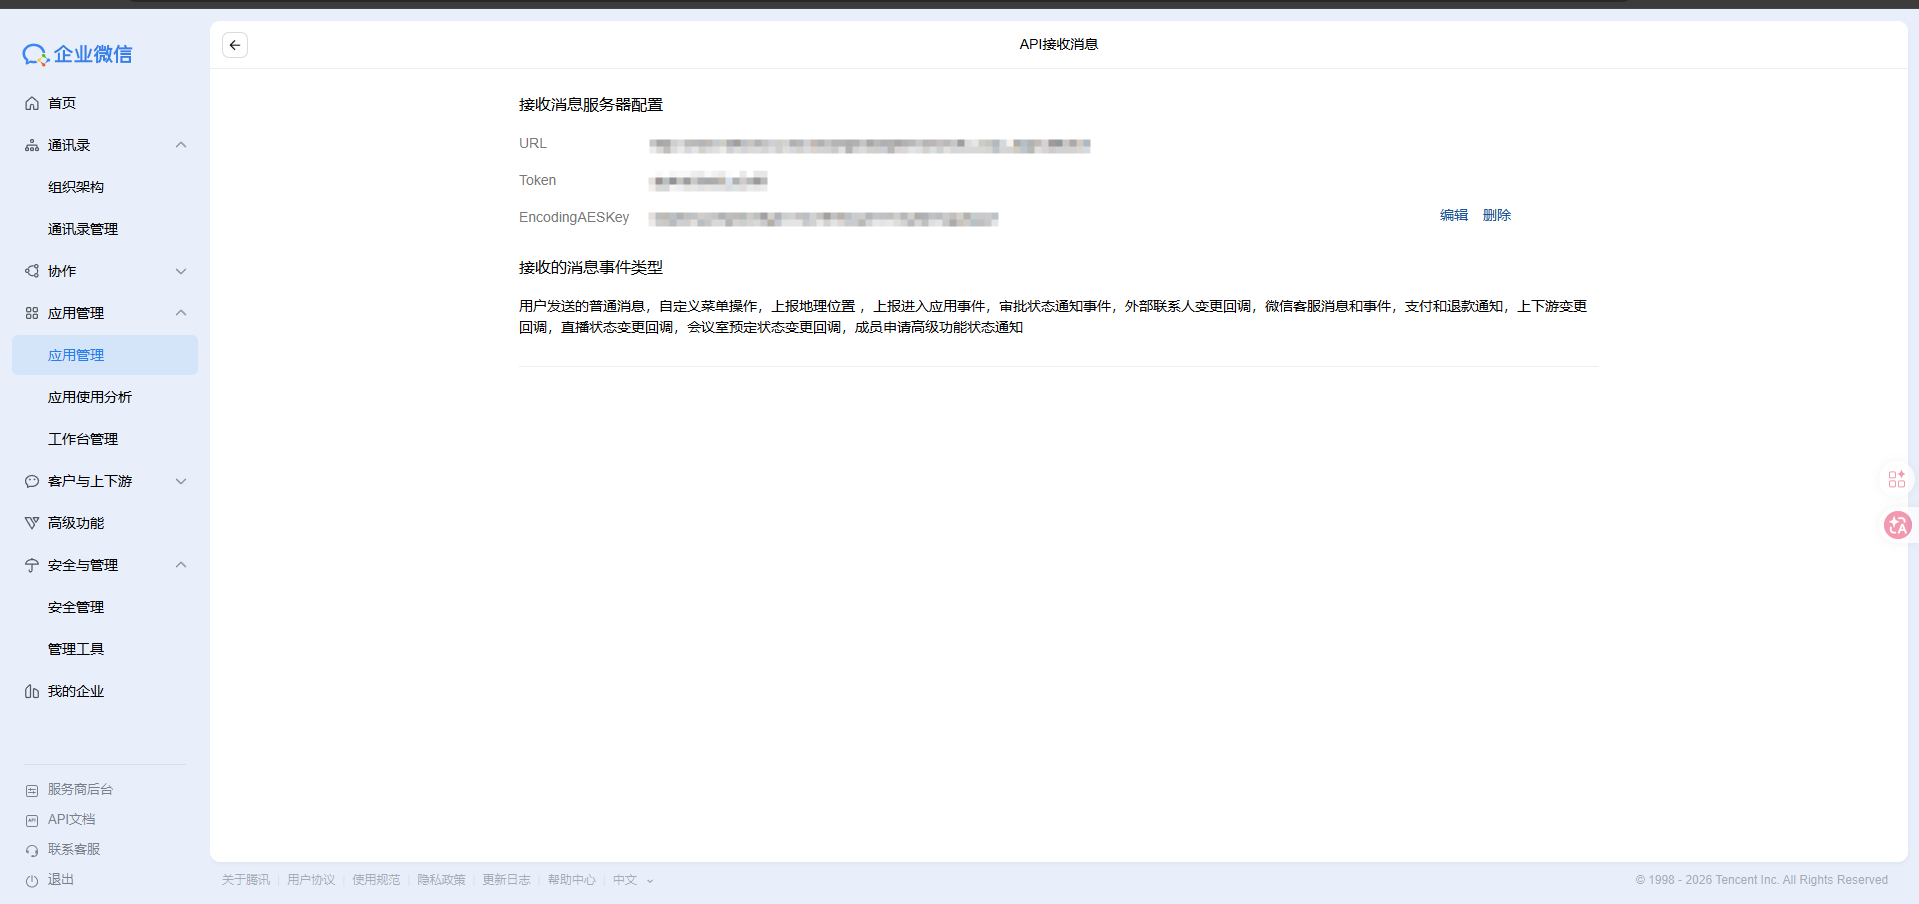
Receive Messages, clickSet API Receive - Fill in
URL, then generate and recordTokenandEncodingAESKey.URLmust be the public HTTP/HTTPS address you prepared in advance, and it should point to Nekro Agent's WeCom custom app callback endpoint:http://ip:port/api/adapters/wxwork_corp_app/callback. If you do not have a public domain, this adapter is not suitable for you. Use WeCom AI Bot instead - After you obtain the two tokens, do not click save yet. Complete step 2 first, enable the adapter, and restart Nekro Agent. Then return here and click save. Otherwise the URL verification will fail
- After the app is saved, go to the app management page and configure the trusted IP. On the machine where you deployed the service, run
curl ifconfig.me, then fill the output intoEnterprise Trusted IPand save
Step 2: Fill in the settings in Nekro Agent
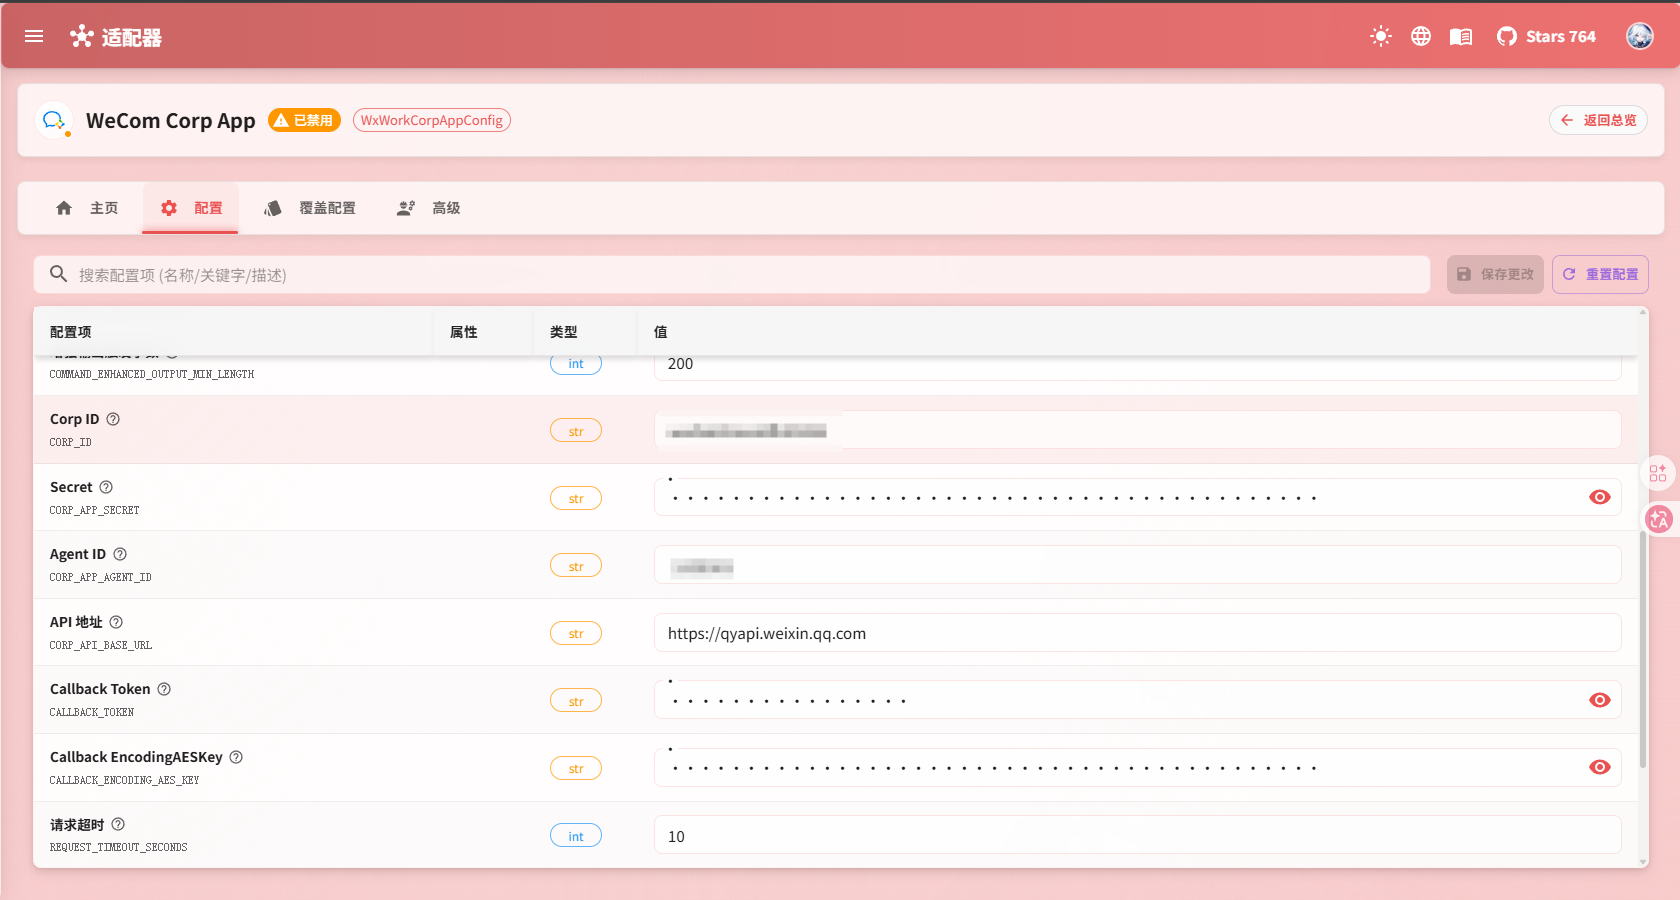
- Open
Adapters->WeCom Corp App - Turn on
Enable Adapter - Fill in:
Corp IDSecretAgent IDCallback TokenCallback EncodingAESKey
- Save the settings and restart Nekro Agent
Corp ID needs to be obtained from the enterprise console:
- Web:
My Company->Company ID - Desktop: not supported
Step 3: Confirm that the setup works
- Send a test message to the app
- If Nekro Agent can receive and reply, the setup is successful
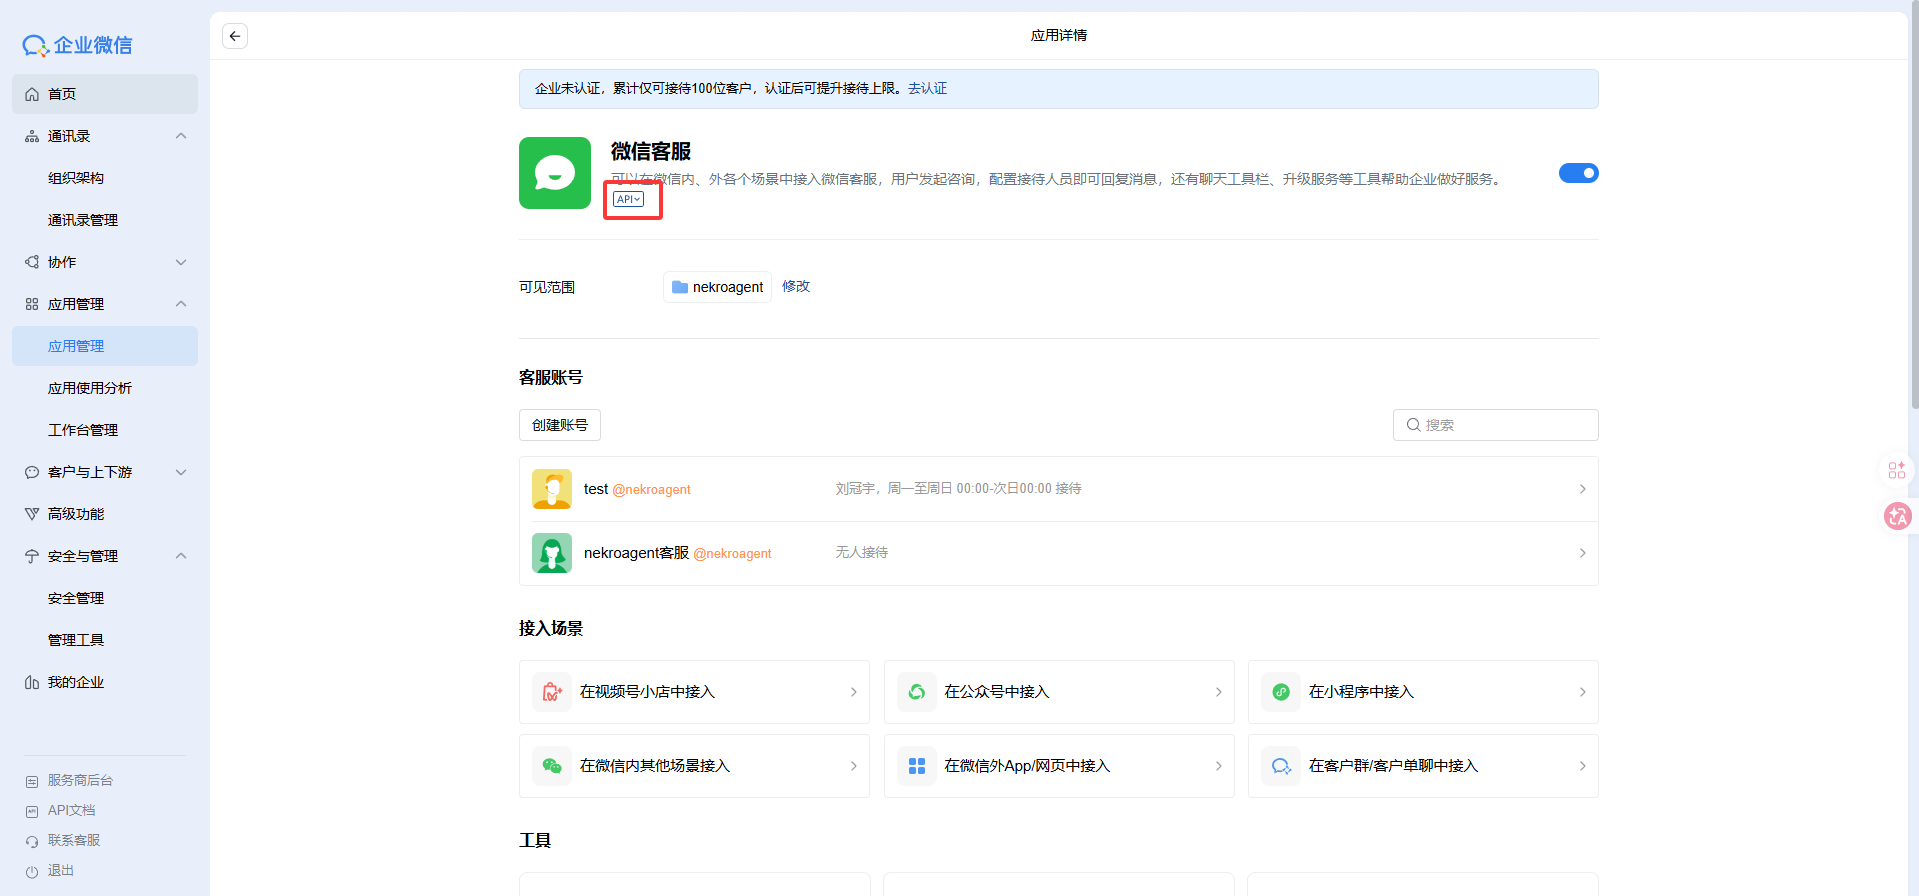
Step 4 (Optional): Use Nekro Agent through WeChat Customer Service with the custom app
- Go to the
WeChat Customer Serviceadmin page- Web:
App Management->App Management->WeChat Customer Service - Desktop:
Workbench->WeChat Customer Service
- Web:
- Create a customer service account
- Click the small
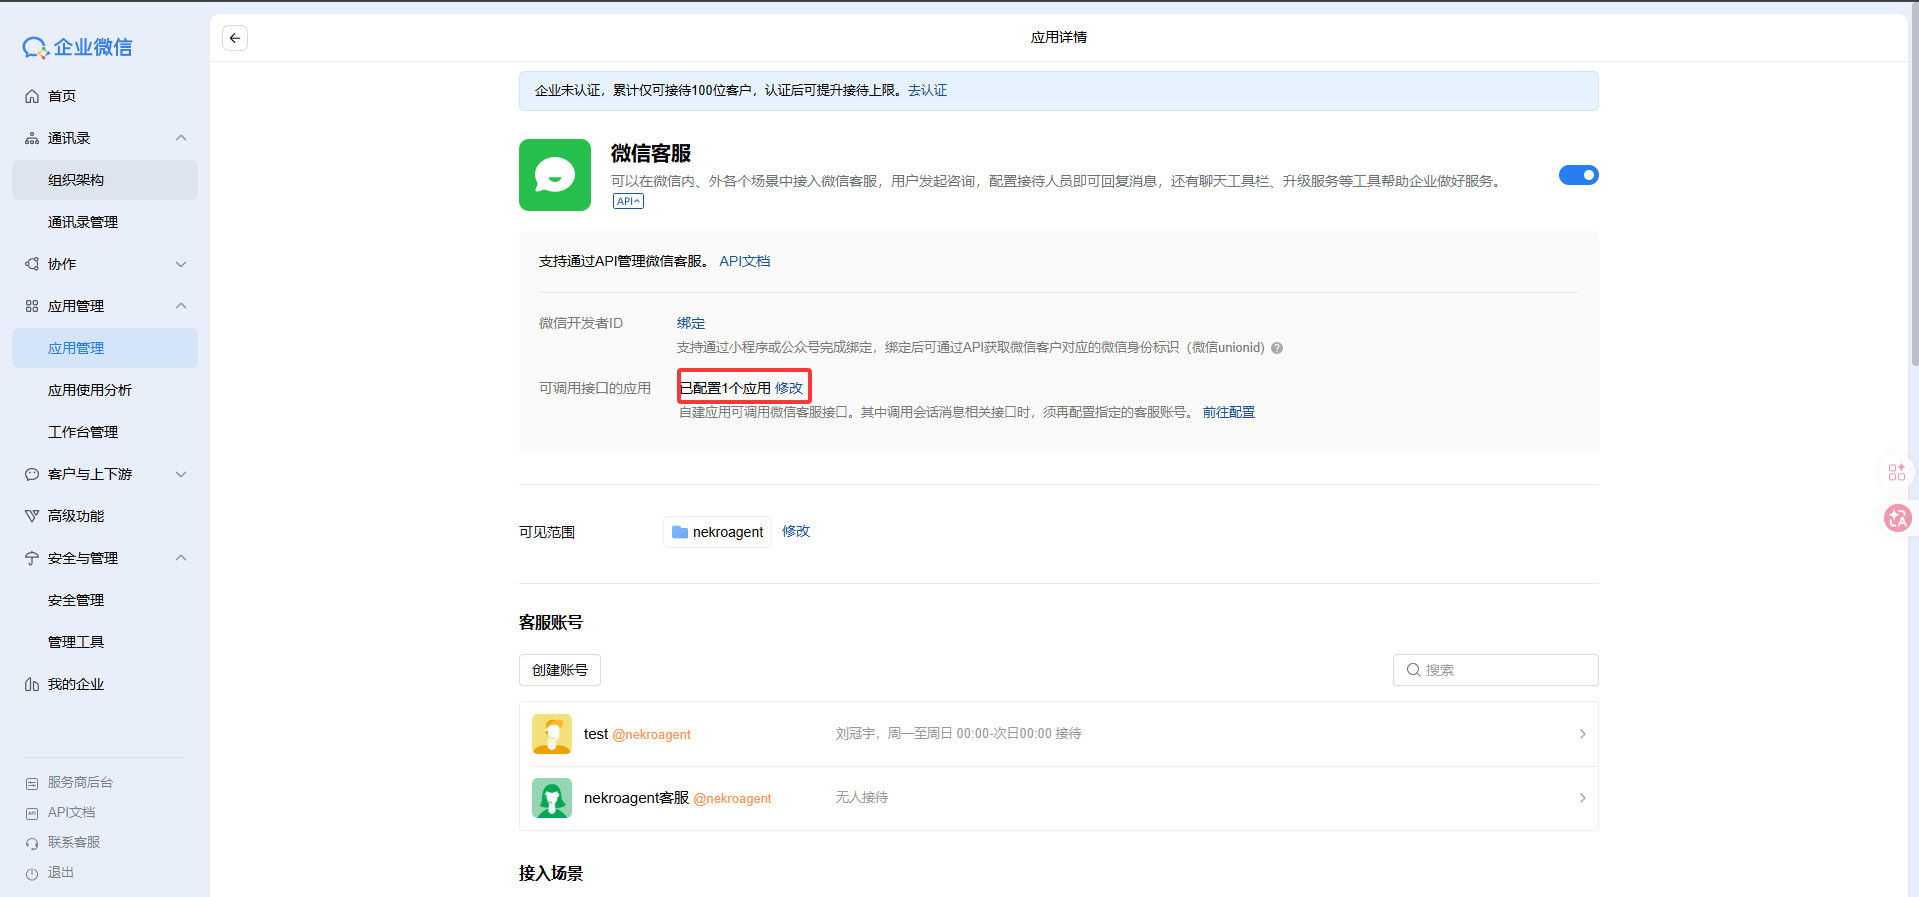
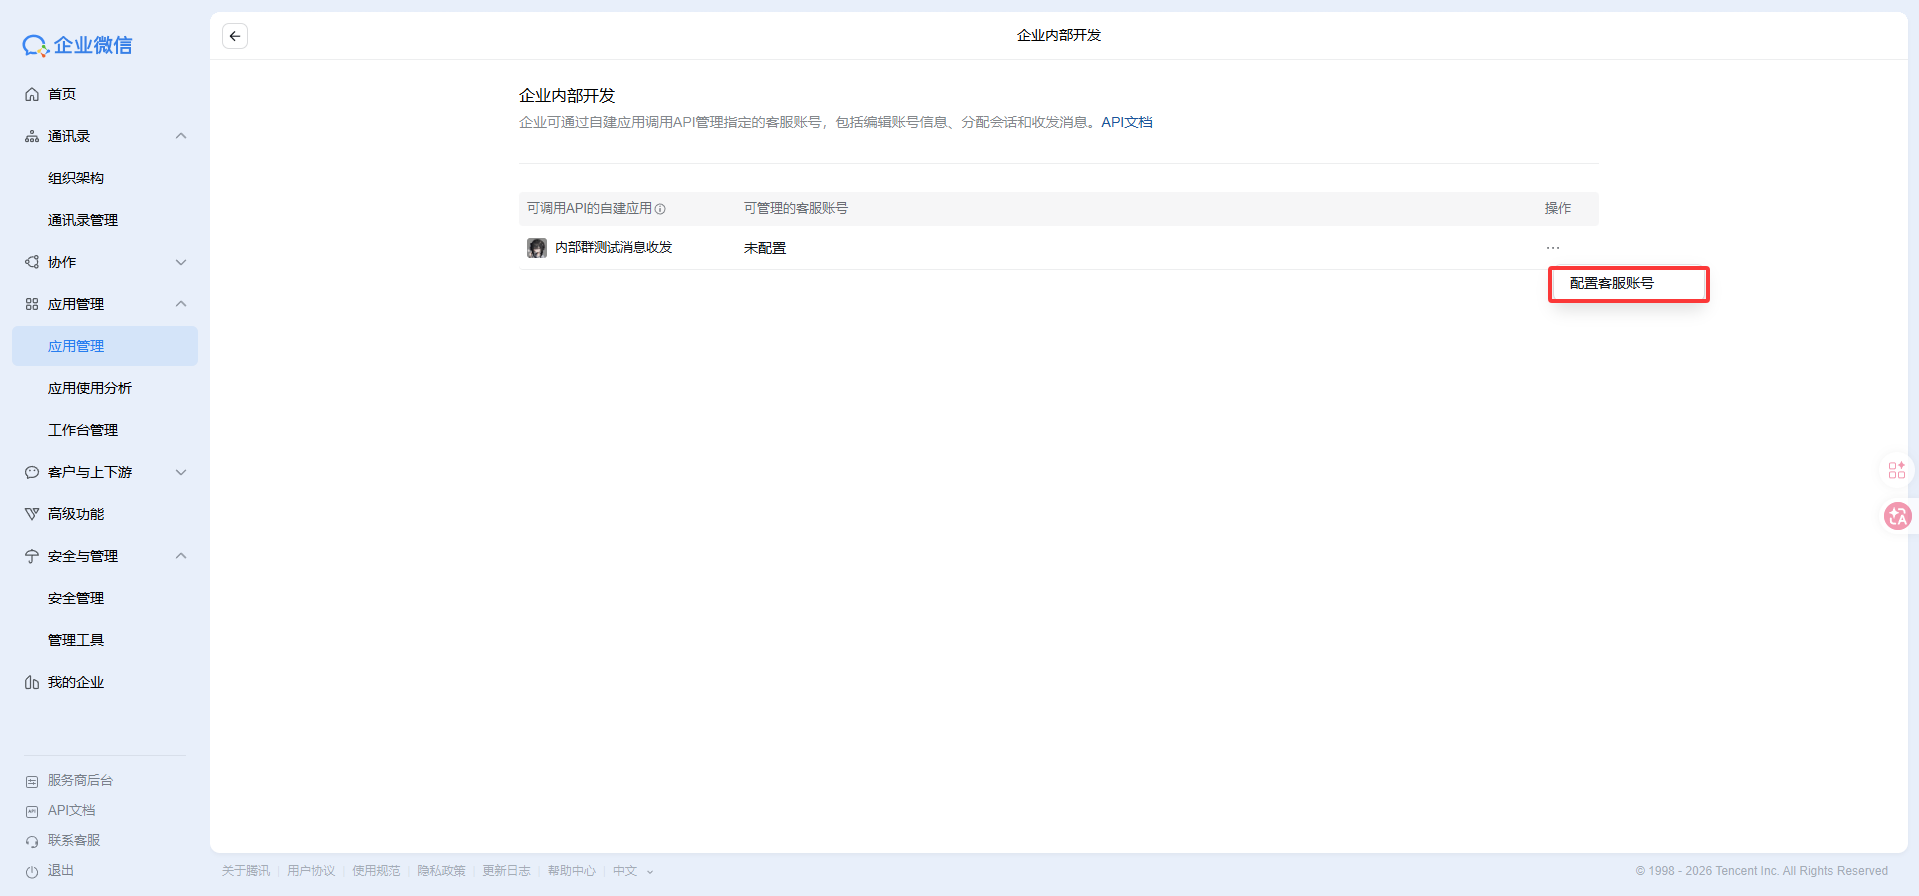
APIbutton below WeChat Customer Service. In the pop-up selector, configureApps Allowed to Call API, check the custom app you just created, and confirm - Click
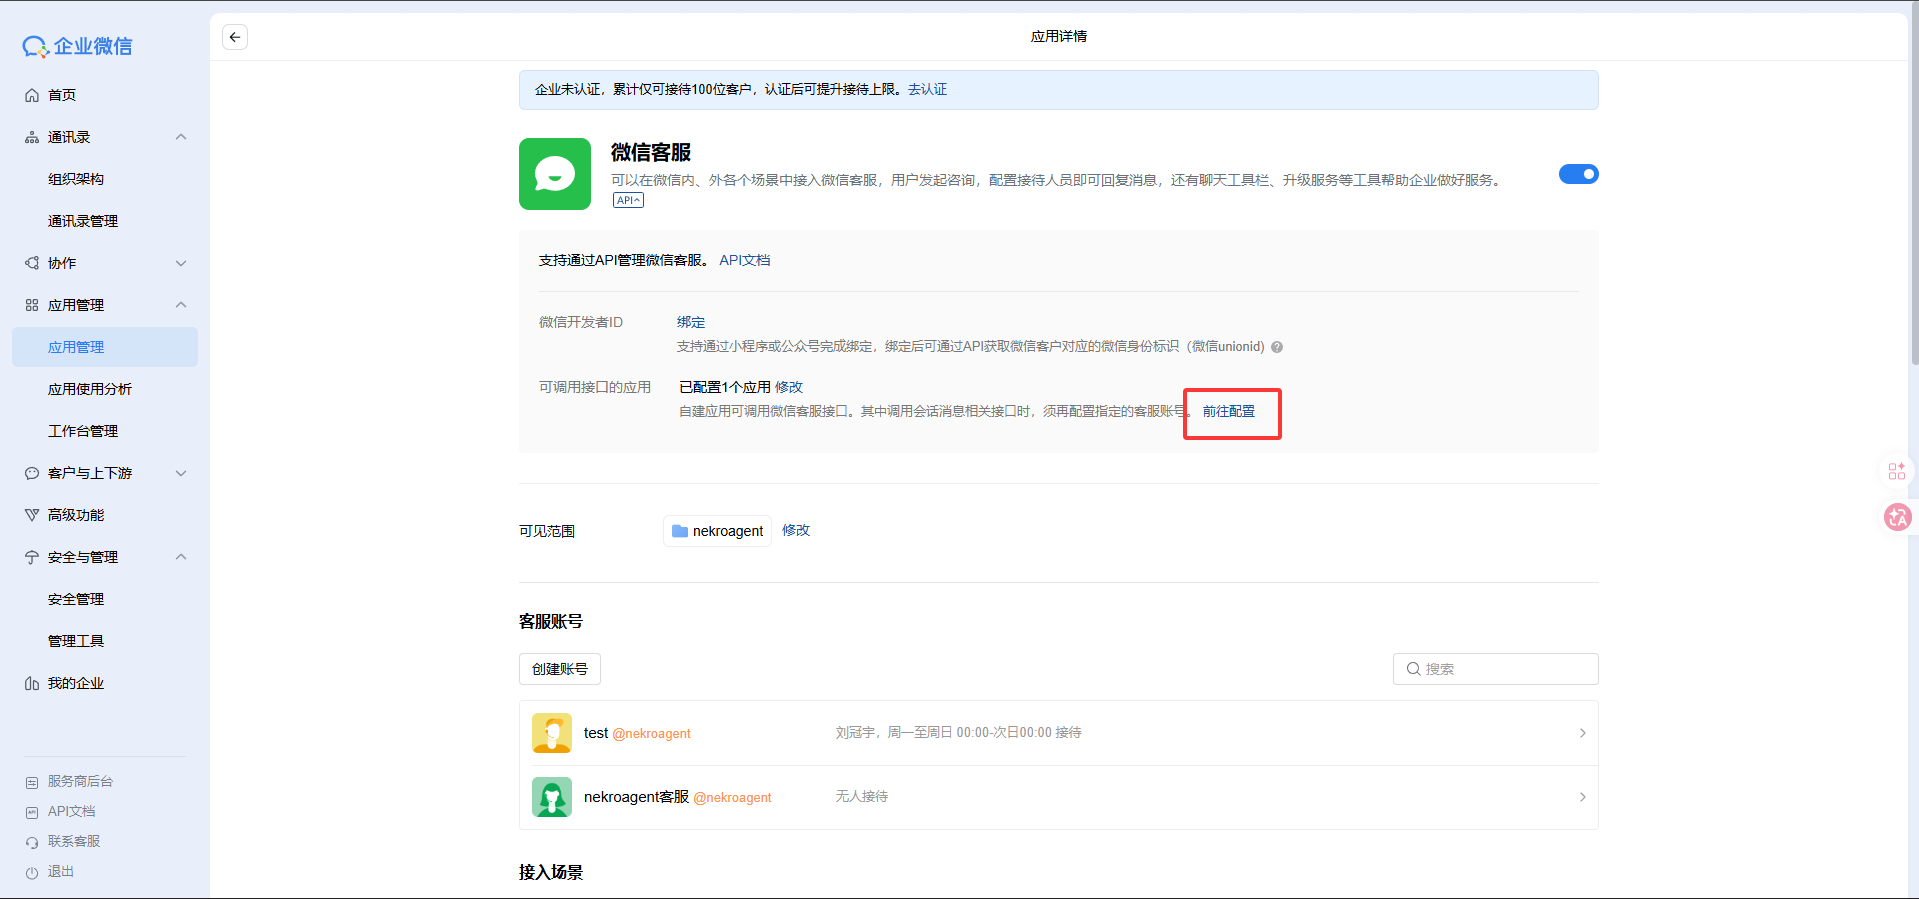
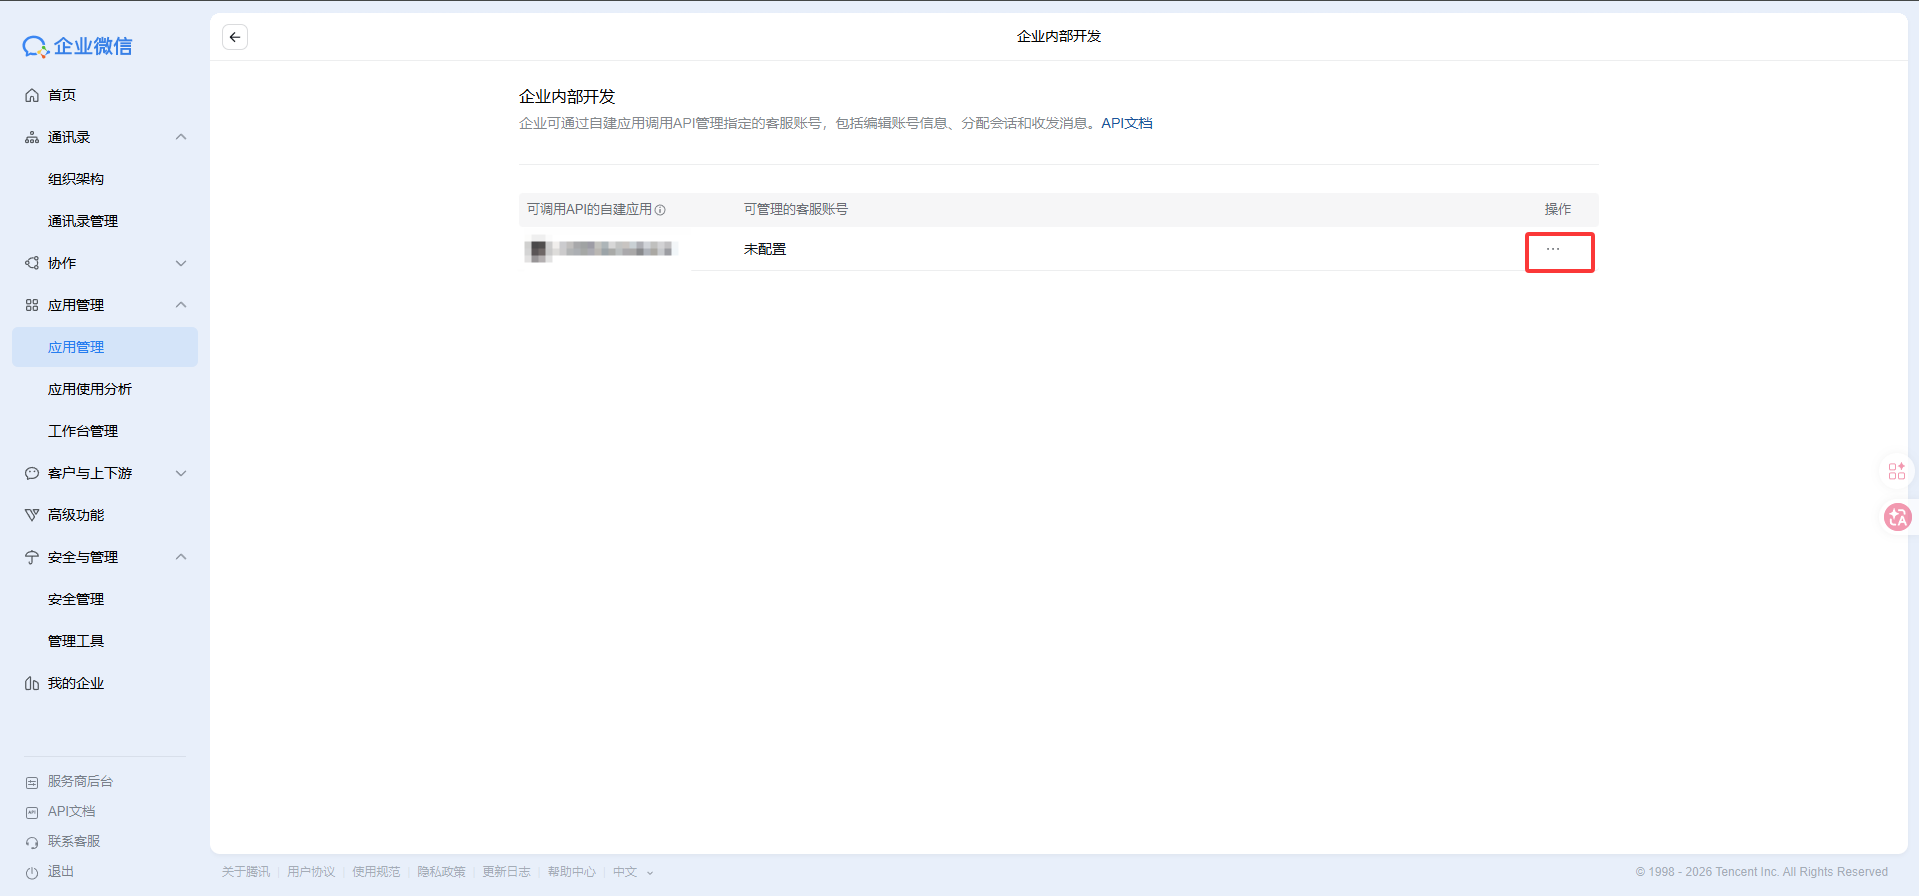
Go to ConfigurationbelowApps Allowed to Call API. On the new page, click...underActions, then clickConfigure Customer Service Account, select the customer service account you just created, and confirm
What to keep in mind for this mode
- It currently mainly supports sending and receiving private messages
Common Problems
The WeCom console says callback verification failed
Check these first:
- Whether the callback URL can be reached from the public Internet
- Whether
CALLBACK_TOKENmatches on both sides - Whether
CALLBACK_ENCODING_AES_KEYmatches on both sides
The app is verified successfully, but the bot does not reply
In this case, check whether CORP_ID, Secret, and AgentId in Nekro Agent were filled in correctly.